
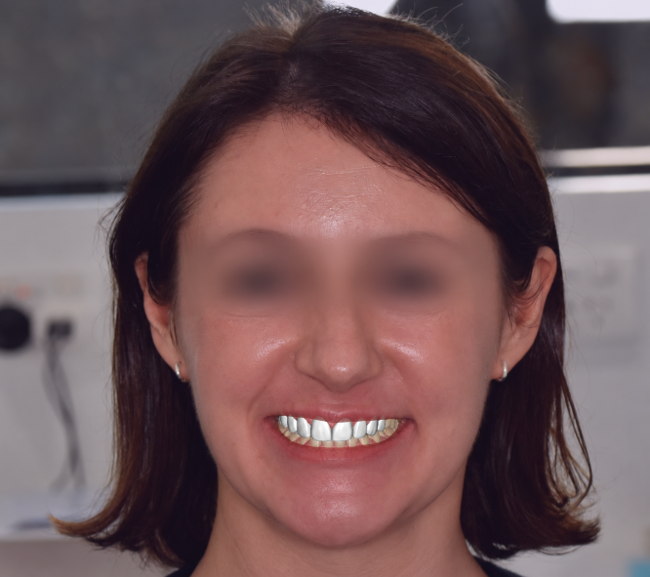
Getting tooth proportions right is what separates a smile design that looks planned from one that looks natural. At Smile Art Lab, proportion work sits at the centre of almost every case we design. Here are nine practical tips we rely on when using DSD to build proportions that hold up in the mouth, not just on screen.
Key Takeaways
- The central incisor is the anchor tooth for every other proportion decision.
- Gingival architecture should be assessed before finalising tooth width.
- A digital smile preview helps assess proportions on screen, while a physical mock-up assessed in the patient’s mouth helps evaluate the proposed design before production.
1. Start With Clinical Photographs and Intraoral Scans
A successful smile design considers more than teeth alone. Clinical photographs and intraoral scans provide the essential references for assessing tooth proportions, alignment, and how the smile relates to the patient’s overall appearance. We also offer 2D smile design to support aesthetic planning. Facial scans are optional and can provide additional information about facial proportions and the natural frame of the smile, but they are not required when dentists submit an aesthetic case. Our workflow uses the available clinical photographs and intraoral scans, along with appropriate design tools, to create a smile design tailored to each patient’s needs.
2. Anchor Everything to the Central Incisor
The central incisor serves as a useful reference point for evaluating other proportions in the smile design. A commonly cited width-to-length ratio of 75–80% can provide a starting reference, but it should not be treated as an ideal that applies to every patient. Individual tooth characteristics and overall smile aesthetics should guide the final proportions.
3. Treat the Golden Proportion as a Guide, Not a Rule
The golden proportion suggests that the apparent width of the upper lateral incisor is approximately 62% of the central incisor’s apparent width, with a similar relationship between the canine and lateral incisor when viewed from the front. It is useful as a starting reference, but it should not be applied rigidly. Natural dentition rarely follows this proportion exactly, and forcing it onto every case can produce a result that looks mathematically neat but visually artificial. Use it to sanity-check a design, not to dictate it.
4. Consider the RED Proportion as a Planning Guide
The Recurring Esthetic Dental (RED) proportion is another guide dentists can use when planning tooth width relationships. It helps assess the gradual reduction in width between adjacent teeth while allowing for individual patient anatomy and existing tooth proportions. Rather than applying a fixed ratio to every case, dentists can consider the RED proportion alongside other clinical and aesthetic factors to support treatment planning and work towards natural-looking results.
5. Respect Gingival Architecture Before Finalising Width
Tooth proportions do not exist in isolation from the gum line. Gingival zenith position, symmetry, and the amount of tissue displayed on a full smile all influence how a tooth’s apparent width reads, even when the measured width has not changed. A tooth that is technically correct on the design screen can still look off balance once the surrounding gum tissue is factored in. We always assess gingival architecture alongside proportion targets, because:
- Uneven zenith heights can make correctly proportioned teeth look mismatched.
- Excess or reduced gingival display shifts the perceived length of the tooth.
- The treating dentist determines whether periodontal treatment is needed and the appropriate treatment sequence.
6. Check the Smile Arc and Buccal Corridor in 3D
Proportions that look balanced from directly in front of the mouth can fall apart once the patient smiles naturally. Reviewing the smile arc and buccal corridors using 3D references, rather than a single frontal 2D photo, shows how the design behaves across the full width of the smile, including the posterior teeth that a flat image often crops out.
7. Validate Against the Facial Midline
A proportionally balanced set of anterior teeth can still appear unbalanced if it does not align well with the facial midline. We assess the dental midline using clinical photographs and intraoral scans, considering how any discrepancy relates to the patient’s facial features and overall smile. Facial scans can also be used as an optional reference when additional facial detail is helpful. Even a shift of 1–2 mm may be noticeable in some cases, while in others it may have little impact on the overall appearance. This assessment helps guide design decisions and can reduce the need for revisions, particularly in patients with natural facial asymmetry.
8. Use a 3D Mock-Up for Review Before Production
No proportion theory replaces seeing the design in context. A digital preview allows the dentist to review the proposed smile design on screen before moving to the next stage. A physical mock-up can then be tried in the patient’s mouth to assess the proposed changes in a clinical setting. These are distinct steps, and approval of the digital design does not replace the dentist’s clinical assessment of the mock-up and its suitability for the patient. This is a core part of the Digital Dentistry process, and it consistently catches issues that are hard to spot on a 2D printout alone.
9. Communicate Proportion Targets Clearly to Your Lab
Even a well-planned proportion strategy can be lost in translation if it is not communicated clearly. Noting the specific width-to-length ratios, proportion theory used, and any deviations from standard ratios saves rounds of revision. Some common errors dentists make with DSD include proportion-related miscommunication, which remains a recurring issue.
Why This Matters in Practice
None of this is purely theoretical. Continuing education providers across Australia now run dedicated courses on tooth proportion and smile design, reflecting how central this skill has become to everyday practice, including a CPD course specifically covering natural tooth proportions for dental practices. Research published in the Australasian Orthodontic Journal on smile perception and gingival display reinforces how sensitive perceived proportions are to small changes in the surrounding tissue, not just the teeth themselves. In cases involving gingival asymmetry, the treating dentist determines whether periodontal treatment is needed based on the patient’s individual clinical assessment. Regulatory awareness matters too, and the Therapeutic Goods Administration’s framework for personalised and 3D-printed dental devices is worth understanding for any lab producing 3D-printed mock-ups or models. Locally, dentists trained directly under the DSD methodology, as profiled by the Australian Dental Association NSW branch, continue to shape how proportion principles are taught and applied across the profession here.
Conclusion
Perfect tooth proportions come from combining proportion theory with careful review, not from applying one formula to every patient. If you would like to support building proportionate, natural looking designs for your next case, contact us and our team will walk through the process with you.
FAQs:
What is the golden proportion in dentistry?
It is a theory suggesting that the apparent width of the upper lateral incisor is approximately 62% of the central incisor’s apparent width, with a similar relationship between the canine and lateral incisor when viewed from the front.
What is the ideal width to length ratio for a central incisor?
A width-to-length ratio of 75–80% is commonly used as a starting reference for central incisor proportions, but the appropriate ratio should be assessed individually for each patient.
Is the golden proportion always used in digital smile design?
No, some dentists use the RED proportion as an alternative planning guide, considering each patient’s individual dentition and tooth proportions when planning treatment.
Why does gum position affect tooth proportion?
Gingival zenith height and symmetry change how wide or long a correctly sized tooth actually appears.
Can proportions be checked before a restoration is made?
Yes, a 3D mock-up preview allows proportions to be reviewed and approved before any production begins.
Does Smile Art Lab work directly with patients on smile design?
No, Smile Art Lab works exclusively with dentists, who then manage the treatment relationship with their patients.
Can proportions be checked before a restoration is made?
Yes, a digital preview allows proportions to be reviewed on screen, while a physical mock-up placed in the patient’s mouth helps assess the proposed design in context before production.