
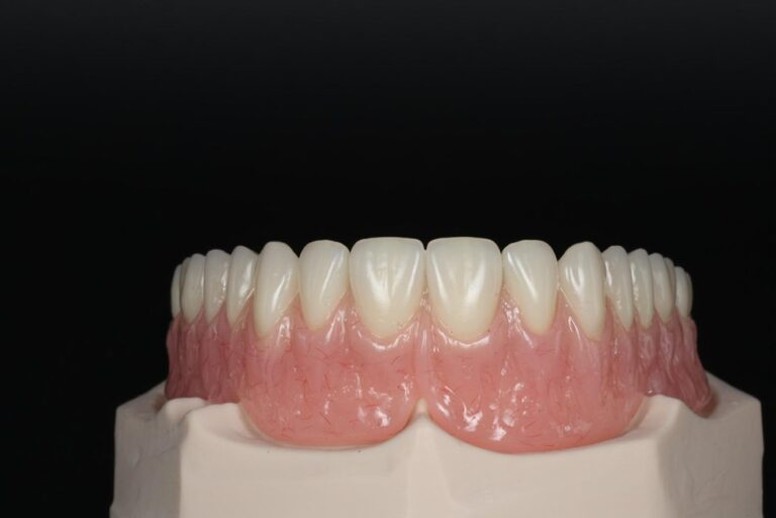
Digital Smile Design (DSD) is most valuable when it becomes a practical workflow between the dentist and dental laboratory, rather than simply a digital preview for the patient. At Smile Art Lab, Sydney’s dedicated dental laboratory for crowns, bridges, implants and prosthodontics, we work with dentists to move DSD cases from accurate records and design review through to physical mock-ups, preparation and final restorative work.
The process starts with complete clinical records, continues through digital design and approval, and finishes with a restoration that follows the agreed aesthetic and functional plan.
Key Takeaways
- Accurate photographs, scans and bite records create the foundation for a reliable DSD case.
- The dentist and laboratory can review the proposed design before any irreversible preparation begins.
- Design review videos help dentists assess tooth proportions, smile line, midline and other aesthetic considerations.
- Physical mock-ups, including models and putty keys, can help transfer the approved design into the clinical setting.
- Prep Check is a planning guide that helps assess whether sufficient tooth reduction has been achieved for the planned restoration. It compares the planned wax-up with the patient’s original teeth and uses colour-coded images and measurements to show where and how much reduction may be needed for monolithic or layered restorations, supporting the dentist’s clinical judgement.
- Clear communication between the dentist and laboratory keeps the case aligned from initial records through to final restoration.
Step 1: Start With Complete, Usable Records
A successful DSD case begins with the quality of the information sent to the laboratory. Digital design cannot compensate for incomplete or inconsistent records.
Depending on the case, this may include clinical photographs, upper and lower intraoral scans, bite records, shade information and implant-specific details.
Photographs provide important information about the patient’s face, smile, lips, gingival display and overall facial context. Intraoral scans capture the teeth and oral tissues, while bite records establish the relationship between the upper and lower arches.
The records required will vary depending on whether the case involves veneers, crowns, bridges, implant restorations or more complex rehabilitation.
For dentists preparing a DSD case, following a consistent photography and records protocol can make the laboratory workflow much more efficient. Our photo protocol provides a useful reference for preparing the required records.
The objective is simple: give the laboratory enough accurate information to understand the existing situation before designing the proposed result.
Step 2: Build the Digital Design
Once the records have been received, the laboratory can begin developing the proposed design.
This is where DSD differs from simply asking a technician to fabricate a restoration from a written prescription. The design considers the relationship between the proposed teeth and the patient’s existing anatomy, including factors such as tooth proportions, midline, smile line, incisal position and gingival architecture.
Traditional treatment planning can already involve diagnostic wax-ups, study models, photographs and detailed clinical assessment. DSD does not replace these fundamental diagnostic steps. Instead, it brings relevant records together in a digital workflow that makes the proposed outcome easier to review, communicate, and modify before treatment progresses.
The dentist and laboratory can therefore work from the same visual reference rather than relying solely on written instructions or separate interpretations of the desired result.
Step 3: Review the Design Before Treatment
Design approval is an important stage in the digital smile design (DSD) workflow. Research indicates that digital smile design can support communication between the dentist, laboratory, and patient by providing a visual reference for discussing the proposed treatment before clinical procedures begin. A 2024 systematic review found that DSD may improve communication, reduce errors, and increase patient satisfaction, although the authors noted that the available evidence remains limited.
Rather than moving directly from digital records to fabrication, the proposed design can be reviewed with the dentist. At Smile Art Lab, design review videos can help dentists see the proposed changes in context and assess the design before the case moves further.
This review provides an opportunity to discuss questions such as:
- Are the proposed tooth proportions appropriate?
- Is the midline positioned correctly?
- Does the incisal edge position work with the patient’s smile?
- Are the planned contours appropriate for the case?
- Does the proposed design meet the clinical and aesthetic objectives?
For cases involving veneers, the digital plan can also be used as a starting point for a diagnostic wax-up and mock-up. Garcia et al. (2018) described the use of digital smile design followed by a direct mock-up as a way to evaluate aesthetic and functional factors before final tooth preparation, including smile position, lower-lip relationship, tooth design, phonetics, and occlusion.
If changes are needed, they can be addressed during the planning stage rather than discovered later in the restorative process. A systematic review of digital workflows for aesthetic veneers also found evidence that digitally designed preparation and guidance systems can improve the predictability and accuracy of veneer preparation, while noting that further clinical research is still needed.
This is one of the practical strengths of a well-managed DSD workflow: the dentist and laboratory can communicate about the proposed result before committing to the next clinical step.
Step 4: Turn the Digital Design Into a Physical Mock-Up
A digital design is useful for planning, but dentists and patients may also benefit from seeing the proposed result in a physical form.
Once the design has been agreed, mock-up models and putty keys can help transfer the planned tooth shape and position into the clinical environment.
A physical mock-up allows the dentist to assess the proposed design directly and can make it easier to discuss the intended result with the patient. Depending on the case, it can also provide an important reference when evaluating tooth length, contours, and the overall smile.
This creates a useful bridge between the digital planning stage and the clinical appointment.
Instead of moving straight from a computer screen to definitive restorative work, the proposed design can be assessed in a tangible format first.
Step 5: Use the Approved Design to Guide Preparation
Once the design has been reviewed and the clinical plan is established, the approved design can help guide preparation.
This is where communication between the dentist and laboratory becomes particularly important. The final restoration needs to accommodate the planned tooth position and contours while also respecting the clinical requirements of the case.
Prep check reduction reports, where relevant, can provide an additional reference for assessing preparation clearance against the planned restoration.
This does not replace the dentist’s clinical judgement. Instead, it gives the clinical team another way to compare the preparation with the restorative requirements identified during planning.
Identifying potential clearance issues earlier can help reduce avoidable adjustments later in the case.
Step 6: Move From Approved Plan to Final Restoration
After the preparation and final records have been completed, the laboratory can proceed with the definitive restoration according to the approved plan.
The final case may involve crowns, bridges, veneers, implant restorations, dentures, or other prosthodontic work, depending on the treatment plan.
At this stage, the earlier planning becomes a useful reference. The laboratory has already reviewed the intended design with the dentist, and the physical or digital planning records provide a clearer target for fabrication.
Case-specific information such as shade selection, implant details, preparation scans, and updated bite records can then be incorporated into the final restorative workflow.
The result is not simply a restoration made from a scan. It is the final stage of a process that has been planned, reviewed, and communicated between the dentist and laboratory.
Why the Dentist-Laboratory Relationship Matters
DSD technology is only one part of the process. Communication is what connects each stage of the case.
For Smile Art Lab, that means working directly with dentists throughout the workflow rather than dealing with patients directly. The laboratory needs to understand the dentist’s clinical objectives, while the dentist needs clear information about what the proposed design means for the restorative stage.
That communication can happen through design reviews, case discussions, mock-up models, putty keys, and preparation feedback, depending on what the individual case requires.
It also means identifying questions before they become problems. If something in the records, design or preparation needs clarification, addressing it early is generally more useful than waiting until the restoration reaches the final stages.
DSD Is a Workflow, Not Just a Digital Preview
The biggest practical value of Digital Smile Design is not simply being able to show a patient what their smile could look like. Its value comes from creating a structured workflow between clinical records, digital planning, design approval, physical mock-up and restorative fabrication.
A typical case can therefore follow this path:
Records → Digital Design → Design Review → Approval → Mock-Up → Preparation → Final Records → Restoration
Each stage allows the dentist and laboratory to check that the case is moving in the intended direction.
For dentists considering a more structured DSD workflow, the focus should therefore be on more than the software itself. The records need to be accurate, communication needs to be clear, and the approved design needs to translate effectively into the clinical and laboratory stages.
Conclusion
A well-planned DSD case gives the dentist and laboratory a shared reference point from the first records through to the final restoration. At Smile Art Lab, we support dentists throughout that process with digital design reviews, physical mock-up models, putty keys and Prep Check reduction reports where relevant. This structured approach helps reduce uncertainty in treatment planning and supports dentists in achieving more predictable aesthetic results. If you are planning a restorative case and would like to discuss the workflow, contact Smile Art Lab to talk through your requirements, case planning and laboratory support.
FAQs
What records are needed for a Digital Smile Design case?
Records vary depending on the case, but may include clinical photographs, upper and lower intraoral scans, bite records, shade information and case-specific implant details.
How does the dentist review a DSD design?
The proposed design can be reviewed between the dentist and laboratory before treatment progresses. Smile Art Lab can provide design review videos to help dentists assess the proposed outcome.
What is a physical mock-up in Digital Smile Design?
A physical mock-up transfers the proposed digital design into a tangible model that can be assessed clinically and discussed with the patient. Models and putty keys can be used depending on the case.
Does DSD replace traditional diagnostic planning?
No. Traditional planning can include diagnostic wax-ups, study models, photographs and clinical assessment. DSD adds a digital workflow that helps bring relevant records and the proposed design together for review and communication.
Can Smile Art Lab help with complex restorative cases?
Yes. Smile Art Lab works with dentists on restorative cases involving crowns, bridges, veneers, implants, dentures, and prosthodontic treatment, with the workflow adapted to the requirements of each case.