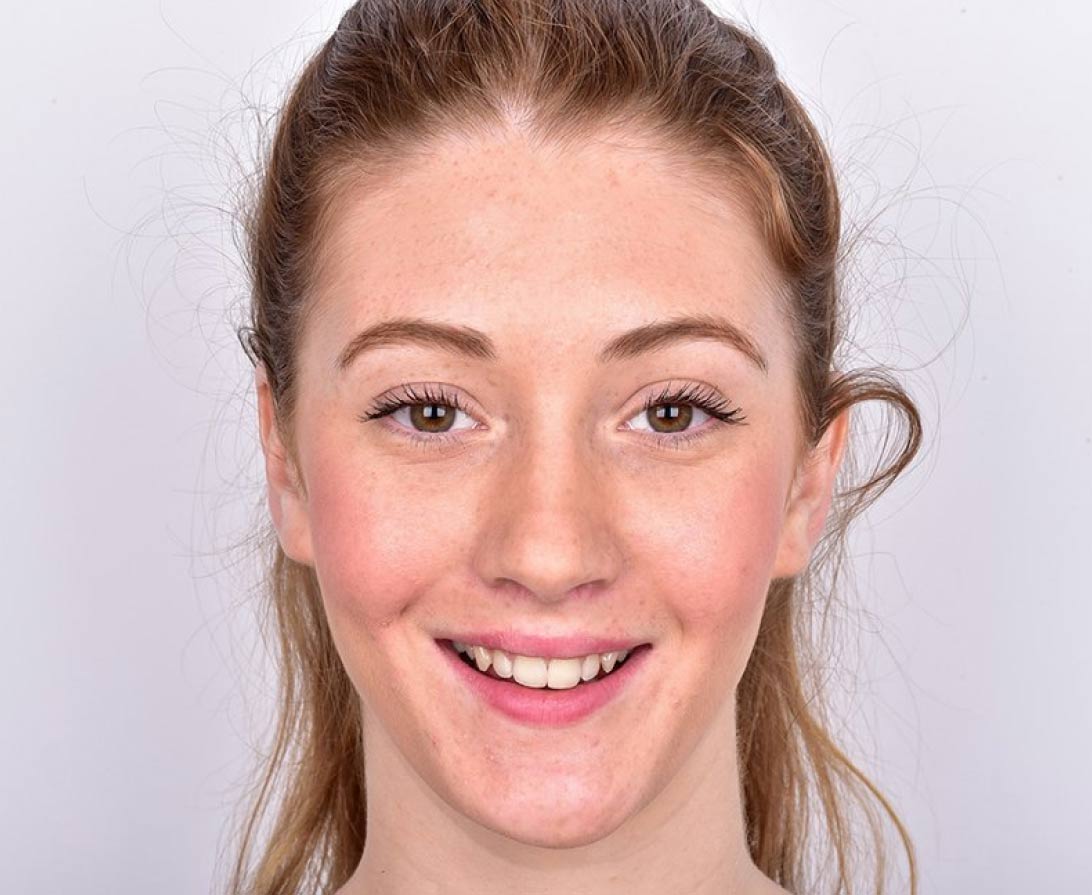
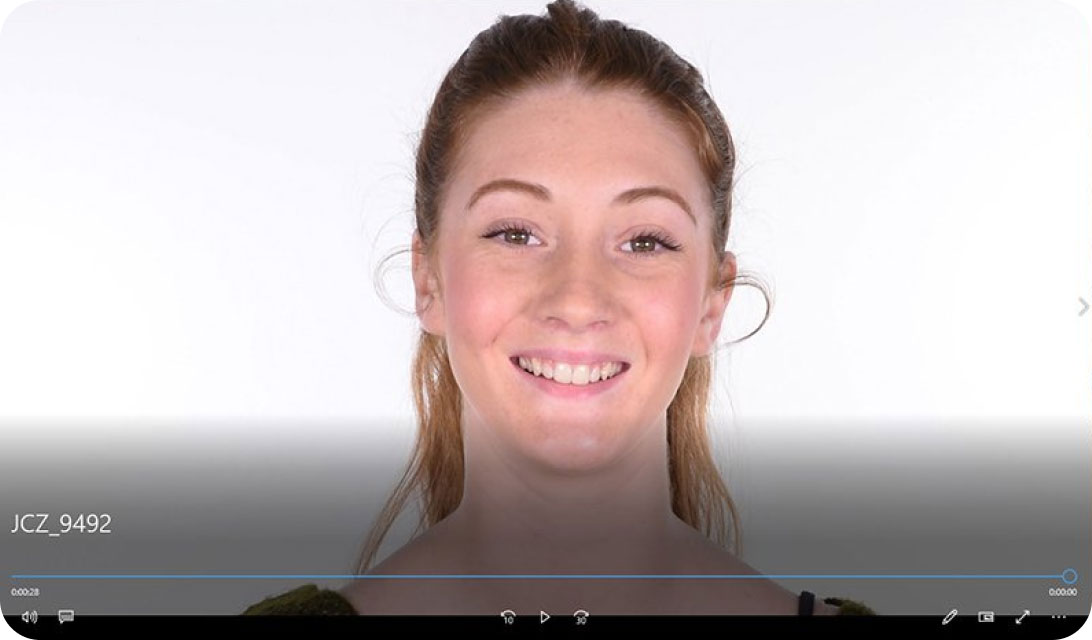
*All pictures should be taken with good lighting (LED light or flash/softbox)
1 meter away from the patient (to prevent distortion).
Camera at the patient’s eye level.
Phone/camera straight (tripod devices help).
Make sure that you can see the same amount of both ears to ensure that the face is not rotated horizontally.
Make sure the patient does not lift their chin up or down when smiling (very common!).
Make sure the incisal edges are not covered by the lower lip.
Maximum smile with the arches at least slightly separated.
Patient should be looking at the camera.
Make sure you put the focus on the patient’s mouth, this way it will be the sharpest area of the picture.
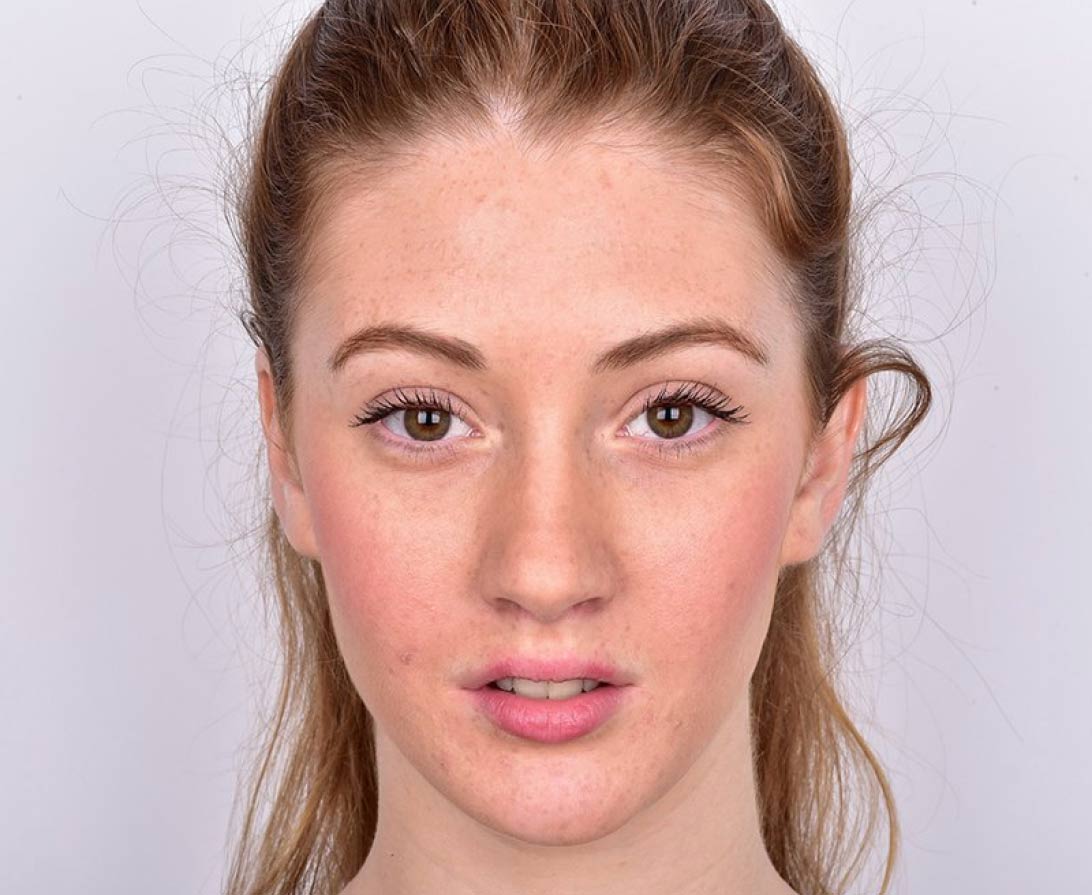
FRONTAL PICTURE AT REST:
*All pictures should be taken with good lighting (LED light or flash/softbox)
1 meter away from the patient (to prevent distortion).
Camera at the patient’s eye level.
Phone/camera straight (tripod devices help).
Make sure that you can see the same amount of both ears to ensure that the face is not rotated horizontally.
Make sure the patient does not lift their chin up or down.
Ask the patient to make a prolonged ‘m’ sound with ‘lazy’ lips to get the best position.
Some patients will struggle to get this position correct. You can record a video of them making this sound and then take a screenshot.
Patient should be looking at the camera.
Make sure you put the focus on the patient’s mouth, this way it will be the sharpest area of the picture.
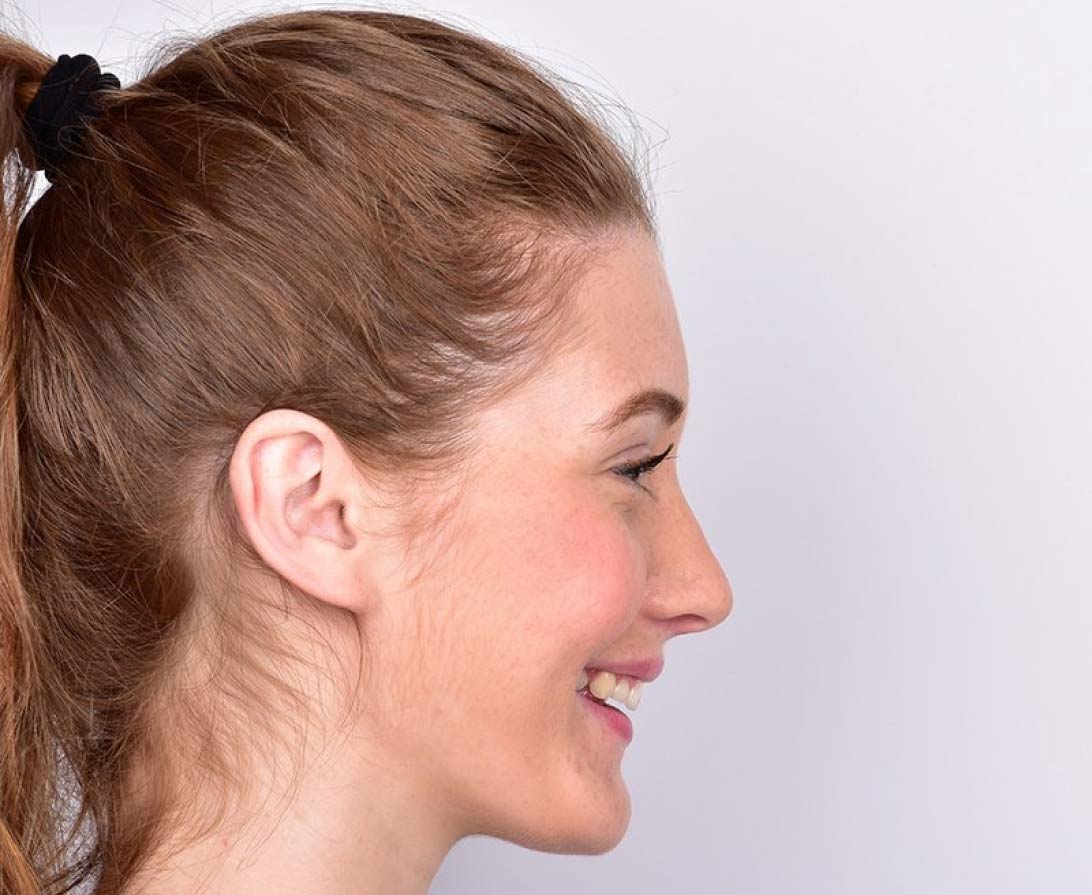
PROFILE PICTURE SMILING:
*All pictures should be taken with good lighting (LED light or flash/softbox)
1 meter away from the patient (to prevent distortion).
Camera at the patient’s eye level.
Phone/camera straight (tripod devices help).
Right profile (always!).
Patient should be looking at the horizon.
Make sure the patient does not lift their chin up or down when smiling (very common!).
Make sure the incisal edges are not covered by the lower lip.
Maximum smile with the arches at least slightly separated.
Make sure you put the focus on the patient’s mouth, this way it will be the sharpest area of the picture.
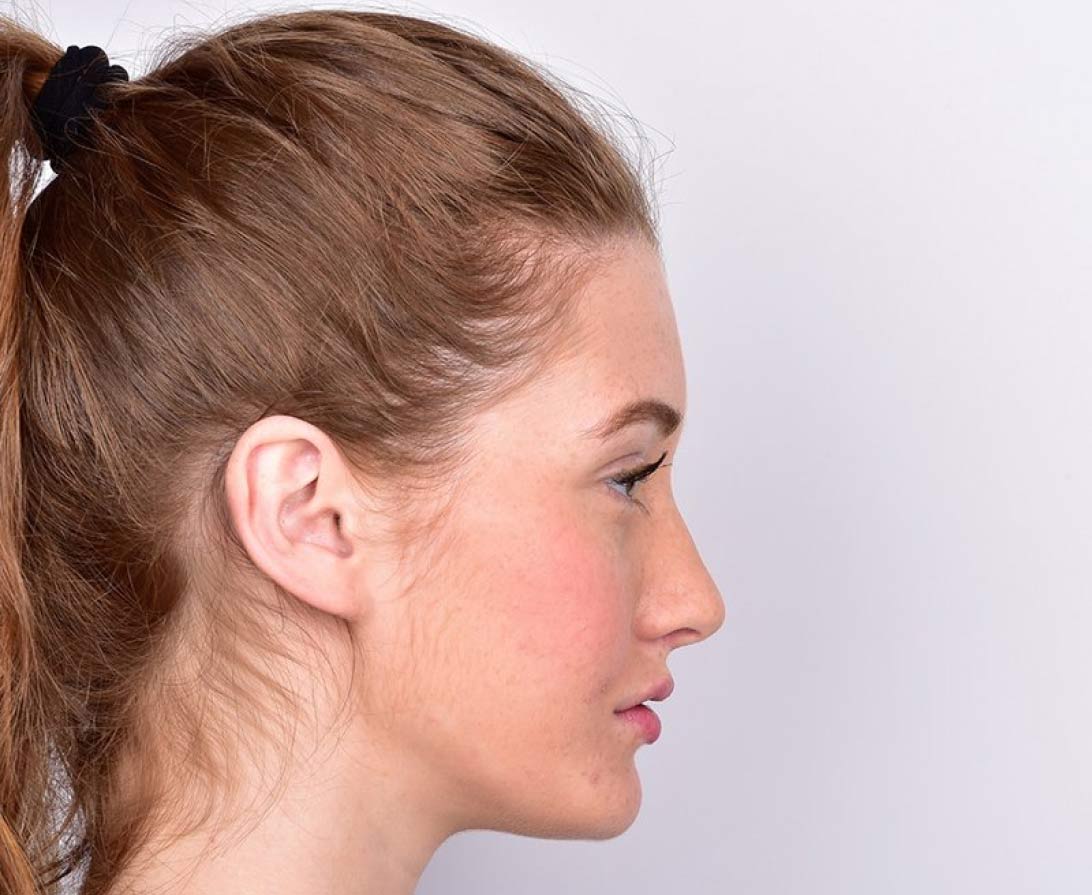
PROFILE PICTURE AT REST:
*All pictures should be taken with good lighting (LED light or flash/softbox)
1 meter away from the patient (to prevent distortion).
Camera at the patient’s eye level.
Phone/camera straight (tripod devices help).
Right profile (always!).
Patient should be looking at the horizon.
Make sure the patient does not lift their chin up or down .
Ask the patient to make a prolonged ‘m’ sound with ‘lazy’ lips to get the best position.
Some patients will struggle to get this position correct. You can record a video of them making this sound and then take a screenshot.
Make sure you put the focus on the patient’s mouth, this way it will be the sharpest area of the picture.
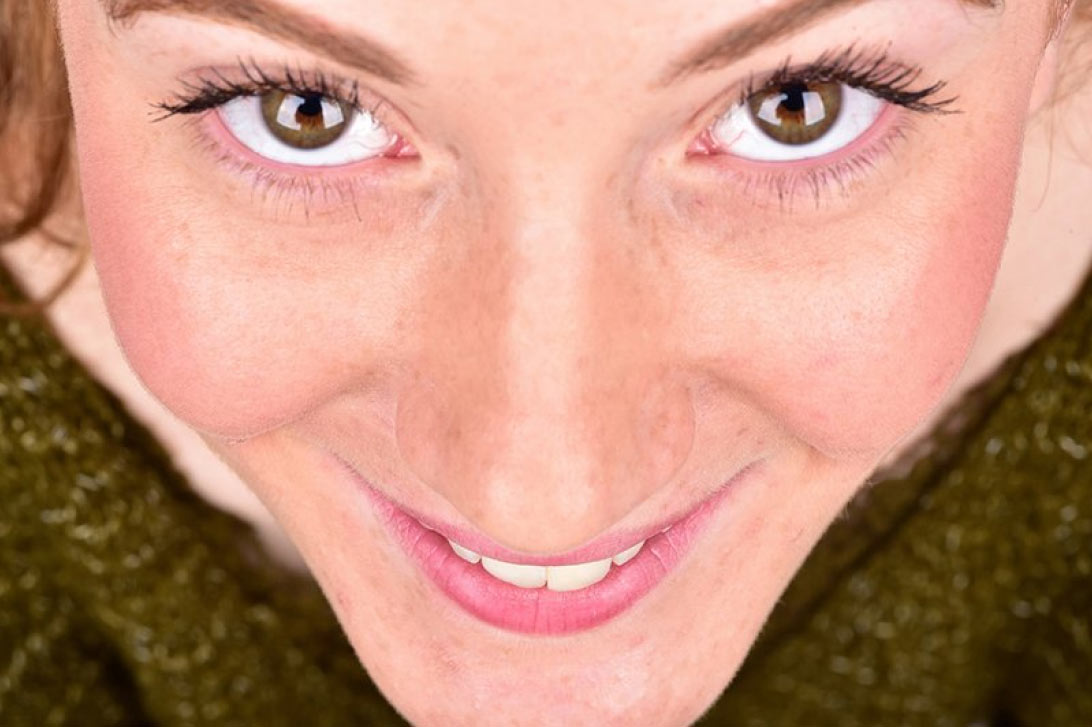
FRONTAL 12 O’CLOCK PICTURE:
*All pictures should be taken with good lighting (LED light or flash/softbox)
Camera: take this photo with the patient lying down in the dental chair and you standing behind.
Phone: take this photo with the patient sitting on a chair or standing. Ask the patient to place their chin near to their chest.
Patient should be looking at the camera.
Make sure that you can see the same amount of both ears to ensure that the face is not rotated horizontally. Maximum smile. Make sure the incisal edges are not covered by the lower lip.
If the patient has wear, short teeth or long lip and incisal edges are not shown: ask the patient to lift their lip with their fingers in the smile direction until you are able to see tooth structure.
At least the incisal edges from canine to canine should be shown.
How do we know when we have a good 12 o’clock position? The tip of the nose should be at the beginning of the upper lip in this view and not cover the teeth.
Make sure you put the focus on the patient’s mouth, this way it will be the sharpest area of the picture.
VIDEO:
*All pictures should be taken with good lighting (LED light or flash/softbox)
Repeat the whole protocol in case you need to take some screenshots of any position. This is also important to evaluate dynamics, function and esthetics.
Make sure you record a short interview with the patient, talking about their wishes and expectations.
Always ask positive questions! (What do you like about your smile? What makes a beautiful smile for you?).
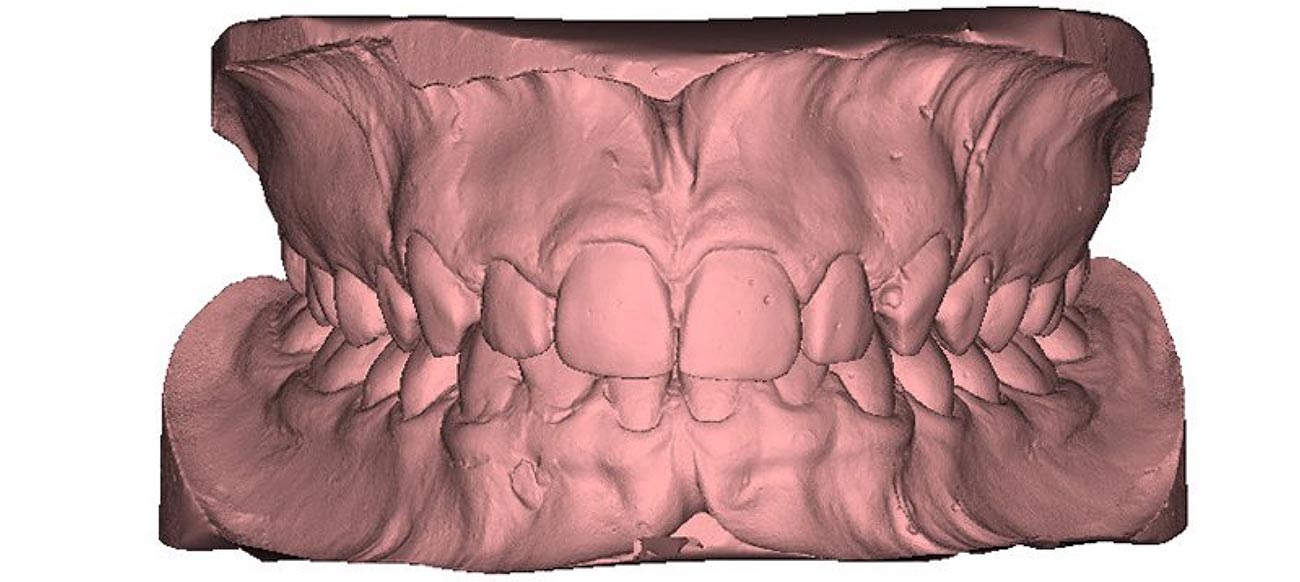
STL MODELS IN OCCLUSION:
Make sure you do a good quality scan of all tooth structure and as much soft tissue as possible. Make sure the occlusion is the right one before you scan.
When you are scanning the upper, it’s also important to scan the palatal area in order to work with the files.
Google Rating
4.9
Based on 31 reviews
[contact-form-7 id="595" title="Work Together Form_copy"]