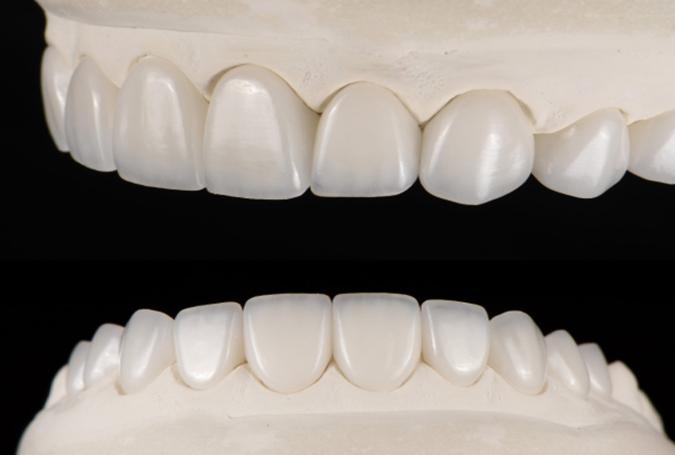
At Smile Art Lab, veneer preparation and bonding is more than a clinical procedure; it’s an art form guided by precision, planning, and proven technique. Every stage, from enamel contouring to final placement, demands a balance between function and finesse. Whether you’re restoring a single tooth or enhancing a full smile, mastering veneer protocols ensures long-term success and patient satisfaction. This guide outlines refined techniques, step-by-step considerations, and practical tips to elevate your results in cosmetic dentistry.
Key Takeaways:
- Surface preparation directly impacts bonding longevity
- Isolation is crucial for predictable adhesion
- Silanisation enhances ceramic-to-resin bonding
- Correct cement choice affects shade and strength
- Micro-movements during curing can disrupt the fit
1. Understanding the Foundation: Case Selection and Planning
Before touching a handpiece, a clear diagnostic vision must be established. Start with comprehensive photography, digital smile design, and mock-ups. These enable precise visualisation of the final outcome and help align practitioner expectations with the patient’s goals.
- Preoperative communication should also include
- Functional occlusal evaluation
- Periodontal health assessment
- TMJ history and parafunction screening
- Refer to Colgate Professional for broader case selection criteria.
2. Preparation Protocols: Balancing Conservation with Aesthetics
Tooth preparation must honour minimal intervention while allowing adequate space for aesthetic layering.
Recommended technique:
- Use a depth cutter to guide consistent reduction (0.3 mm cervical, 0.5–0.7 mm incisal)
- Create chamfered margins with no sharp internal line angles
- Avoid subgingival extension unless clinically indicated
3. Provisionalisation: Don’t Underestimate Temporaries
Temporary veneers serve more than cosmetic needs. They offer a trial period to assess phonetics, function, and aesthetic contouring. Use a spot-etch technique and flowable resin to anchor provisionals, allowing for easy removal and less enamel trauma.
Make sure provisionals:
- Replicate final veneer contours
- Maintain soft tissue architecture
- Allow for patient feedback
Explore Smile Art Lab’s lab solutions to understand how we support clinics with high-precision temporisation aids.
4. Bonding Techniques: Steps to Adhesive Excellence
Veneer bonding requires a dry, clean field and absolute attention to detail.
Essential steps:
- Etch enamel (37% phosphoric acid, 15–30 seconds)
- Apply silane to the veneer surface and allow evaporation
- Use a dual-cure or light-cure resin cement
- Seat veneers with minimal pressure; spot cure
Thoroughly remove excess cement before final cure
Rubber dam isolation is highly recommended for moisture control. A study from PubMed Central affirms the role of silanisation and bonding agents in enhancing ceramic-to-resin adhesion.
5. Finishing and Polishing: Elevating the Final Aesthetic
Post-cure, the margins should be refined with fine diamonds or polishing discs. Use an interproximal finishing strip for tight contacts and recheck occlusion in centric and excursive movements.
Final tip: Glaze paste or a ceramic polish system enhances surface shine and longevity. Always document shade and surface texture for follow-up visits.
Bonding (BOND)
An essential element of the bonding process is performing a careful try-in to ensure the aesthetics and fit of the veneers are perfect prior to them being permanently affixed. Think of it like trying on a new outfit before walking out of the store. This helps to ensure each veneer aligns precisely with patient expectations.
Important Try-In Considerations:
- Be sure to try veneers both individually and together to confirm an accurate fit, correct aesthetics, and proper interproximal contacts.
- Use a try-in paste to replicate the final cement shade as veneers placed dry do not provide an accurate representation of the final colour.
- The thinner the veneer, the greater the influence cement shade and stump colour will
have on the final appearance so take care to remember this during the try-in process.
Smile Art Lab Bonding Recommendations:
Clean Thoroughly
Once the try-in has been completed, ensure theveneers have been fully cleaned to remove any try-in paste residue before bonding.
Maintain Isolation
Keep the working area clean, dry, and isolated to avoid contamination and achieve optimal bond strength.
Confirm Surface Preparation
Ensure the veneers have the correct surface treatment (etching/priming) according to the material used.
Use Appropriate Cement
Resin cement should be selected based on the thickness of the veneers. For example, thicker veneers (1mm+) are less likely to be influenced by shade cement while thinner veneers require careful shade cement selection.
Internal Systems Matter
At Smile Art Lab, we don’t just provide materials; we offer integrated systems to support clinicians at every stage. Visit our services page to learn how we combine digital workflows with artisan-level craftsmanship for superior results.
Conclusion
Veneer preparation and bonding combine science, artistry, and clinical precision. At Smile Art Lab, we support dental professionals with materials, technology, and guidance to deliver exceptional outcomes. If you’re ready to elevate your veneer workflow or need technical collaboration, get in touch with us today to see how we can assist your practice.
FAQs:
What is the ideal tooth reduction depth for veneers?
Most cases require 0.3–0.7 mm of reduction, depending on aesthetic and structural goals.
Can veneers be bonded without etching?
No. Proper enamel etching is crucial for achieving durable micro-mechanical retention.
How long should silane be left on before bonding?
Apply for 60 seconds, then air dry thoroughly to allow for chemical activation.
Are dual-cure cements better for veneers?
Light-cure cements are generally preferred due to shade stability, but dual-cure may be needed for opaque ceramics.
How do you avoid bubbles during seating?
Use slow, steady pressure, and consider pre-warming your cement. Spot cure and remove excess before full cure.
Why is rubber dam isolation important?
It ensures a moisture-free environment, which is essential for strong bonding.

