Embarking on the journey to a refined smile with porcelain veneers is a transformative experience. At Smile Art Lab, we prioritise precision and artistry in every step, ensuring that both dentists and their patients achieve exceptional results.
Key Takeaways
- Comprehensive Assessment: Initial consultations are crucial to determine suitability for veneers.
- Minimal Enamel Removal: Only a thin layer of enamel is removed to accommodate the veneer.
- Custom Fabrication: Veneers are tailored to match the natural aesthetics of each patient.
- Temporary Placement: Provisional veneers allow patients to preview the final outcome.
- Final Bonding: Permanent veneers are securely bonded, enhancing both function and appearance.
Understanding Porcelain Veneer Preparation
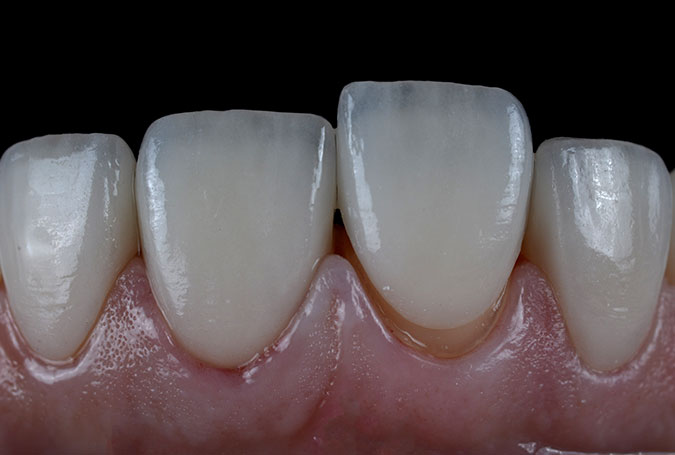
Porcelain veneers are thin shells designed to cover the front surface of teeth, enhancing their appearance. The preparation process is meticulous, ensuring optimal fit and aesthetics.
1. Initial Consultation
The journey begins with a comprehensive evaluation. Dentists assess oral health, discuss aesthetic goals, and determine if veneers are the appropriate solution. This stage may involve digital imaging and impressions to plan the treatment effectively.
2. Tooth Preparation
A minimal amount of enamel, typically around 0.5 mm, is gently removed from the tooth surface. This step ensures that the veneer fits seamlessly without adding bulk. The process is conservative, preserving as much natural tooth structure as possible.
3. Impression Taking
Accurate impressions are taken to create a model of the teeth. This model guides the fabrication of custom veneers that match the desired shape, size, and colour.
4. Temporary Veneers
While awaiting the final veneers, temporary ones are placed. These provisionals protect the prepared teeth and provide a preview of the anticipated results, allowing for any necessary adjustments.
5. Final Placement
Once the custom veneers are ready, they are carefully bonded to the teeth using specialised dental cement. The dentist ensures proper alignment and bite, making final adjustments for comfort and appearance.
Preparation (PREP)
The preparation stage plays a crucial role in ensuring an aesthetic and long-lasting outcome. Please take note of our recommendations for this step in the process outlined below.
Material-Specific Minimum Preparation Recommendations
| Material | Labial Reduction | Incisal Reduction |
| Monolithic (Emax/Zirconia) | 0.6 mm | 1.5 mm |
| Layered (Emax/Zirconia) | 1 mm | 1.5 mm |
| Feldspathic | 0.3–0.5 mm | 1.5 mm |
| Injection Composite | Minimal to none | Minimal to none |
| Hybrid Ceramic | 0.6 mm | 1.5 mm |
Important to note: The amount of tooth reduction required depends on the final shade you’re aiming to achieve. Lighter shades generally require thicker ceramic to effectively mask the underlying tooth colour. As a guideline, allow approximately 0.2 mm of additional reduction for each step toward a lighter shade; for example, moving from A3.5 to B1 may require a minimum of 0.8 mm.
Material Selection Depending on Stump Colour
1. ND1 to ND4
Any type of material can be used, including monolithic Emax, zirconia, and layered restoration.
2. ND4 to ND8
Layered veneers are recommended to conceal stump colour with the possibility of a crown if there is not enough enamel for bonding the veneer.
3. ND8 or Darker
Consider Porcelain-Fused-to-Metal (PFM) crowns for optimal masking.
General Preparation Guidelines for All Veneers
1. Margins
Clear chamfer margin (approx. 0.3mm) at or slightly below the gum line to avoid dark triangles.
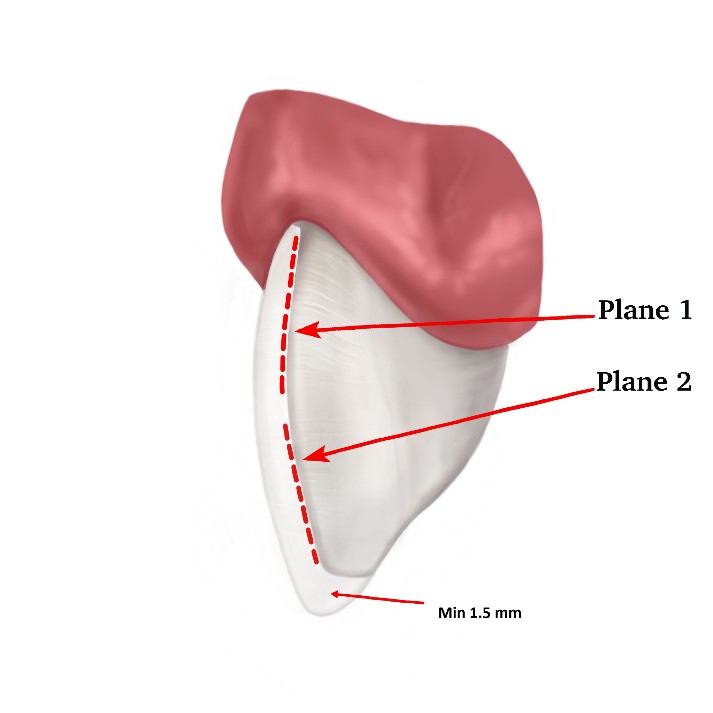
2. Incisal Edge and labial
We recommend a flat incisal reduction (~1.5 mm) with butt-joint. Wrapping to palatal is not recommended unless necessary to reach the enamel.
3. Interproximal Reduction
Extend halfway through the contact points to prevent visible seams and black triangles.
4. Avoid Undercuts
Ensure smooth, converging walls for easy insertion.
5. Smooth Angles
Round incisal and lingual angles to minimise stress concentrations.
6. Clearance
Use silicone reduction guides (provided from the wax-up) to ensure correct tooth structure removal as well as interproximal and incisal clearance.

Conclusion
Porcelain veneers offer a transformative solution for enhancing smiles. The preparation process, while meticulous, ensures that each veneer fits perfectly and meets the aesthetic desires of the patient. At Smile Art Lab, we are committed to supporting dentists and their patients through every step of this journey. Ready to elevate your smile? Contact us today to learn more about our services and how we can assist in achieving optimal results.
FAQs
Q1: How long do porcelain veneers last?
With proper care, porcelain veneers can last between 10 to 15 years. Regular dental check-ups and good oral hygiene practices are essential for longevity.
Q2: Are porcelain veneers stain-resistant?
Yes, porcelain veneers are highly resistant to stains. However, it’s advisable to avoid excessive consumption of staining agents like coffee, tea, and tobacco.
Q3: Is the veneer placement procedure painful?
The procedure is generally painless. Local anaesthesia is used during enamel removal to ensure comfort. Some patients may experience mild sensitivity afterward, which typically subsides.
Q4: Can veneers be whitened?
Porcelain veneers do not respond to traditional whitening treatments. If whitening is desired, it’s recommended to do so before veneer placement to match the desired shade.
Q5: Do veneers require special care?
Veneers should be treated like natural teeth. Regular brushing, flossing, and dental visits are crucial. Avoiding hard foods can prevent potential damage.